Custom views
Introduction
The Custom Views feature in Dotfile allows users to organize records based on specific criteria tailored to their business needs. It enhances efficiency by enabling users to quickly focus on relevant data, whether to follow up on recent cases, monitor specific types of checks, or identify high-risk scenarios.
Custom Views complement the Standard Views provided by Dotfile, offering advanced filtering and personalization capabilities.
Key Concepts
Standard Views
Dotfile provides predefined Standard Views that are accessible to all members of your workspace. These views are fixed and cannot be deleted but offer flexibility in terms of filtering and column sorting. Standard Views are organized into the following categories:
- Checks
- Cases
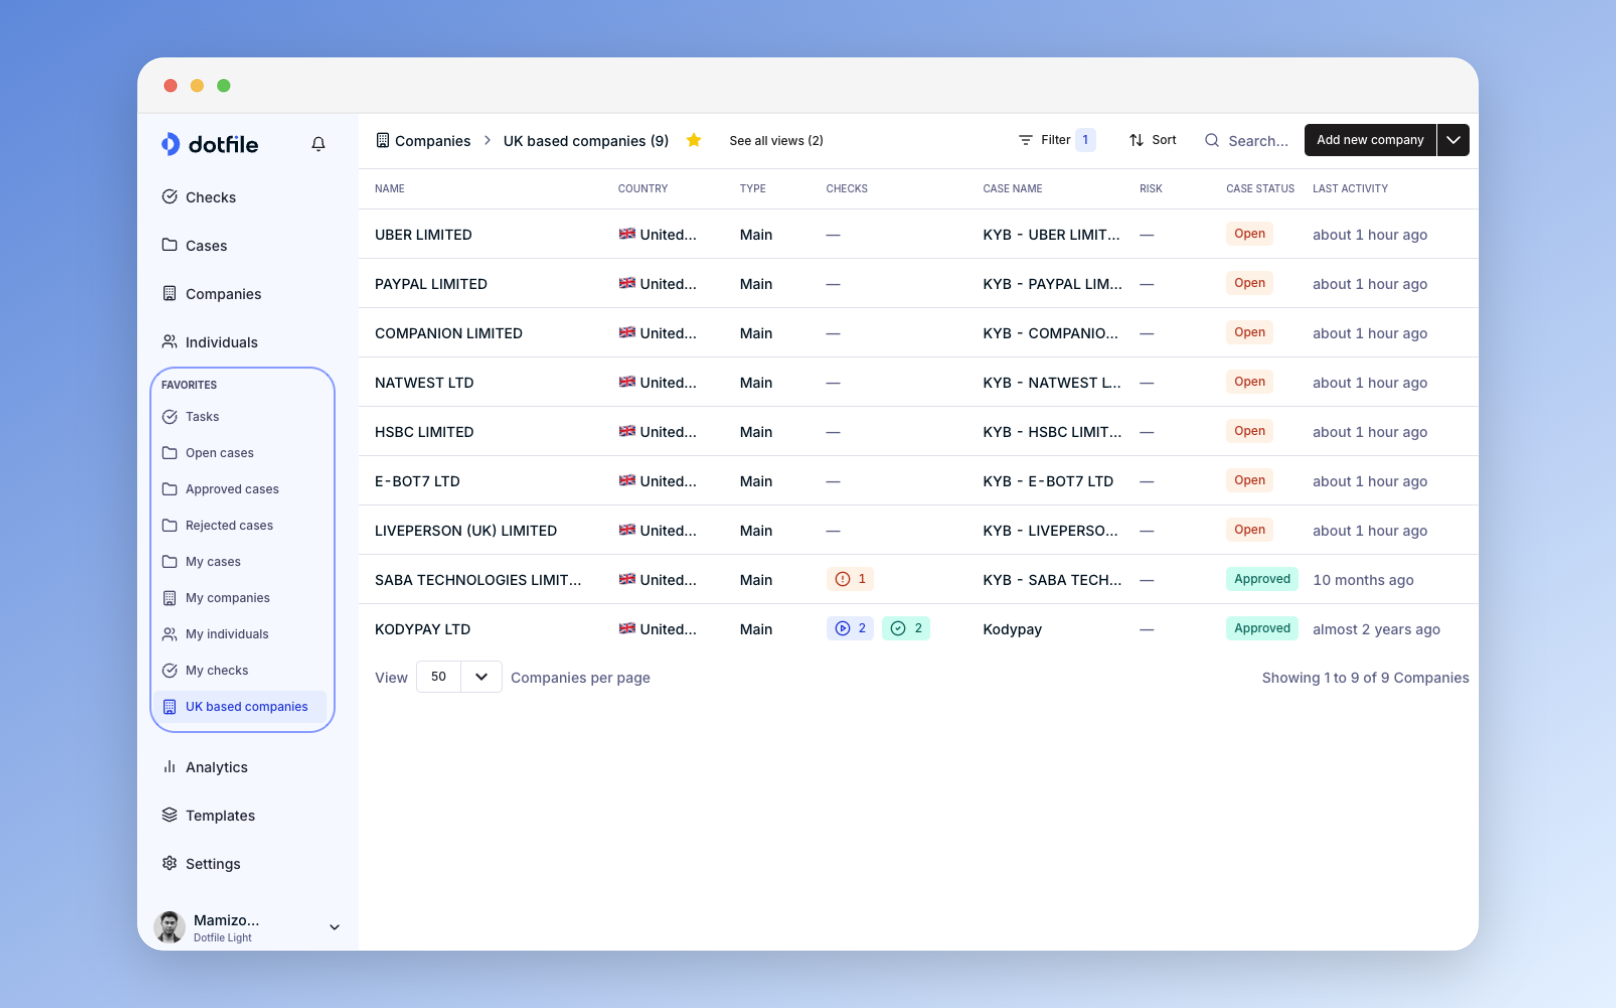
- Companies
- Individuals
Custom Views
Custom Views empower users to:
- Create personalized groupings of records using advanced filtering options.
- Modify or delete views as needed.
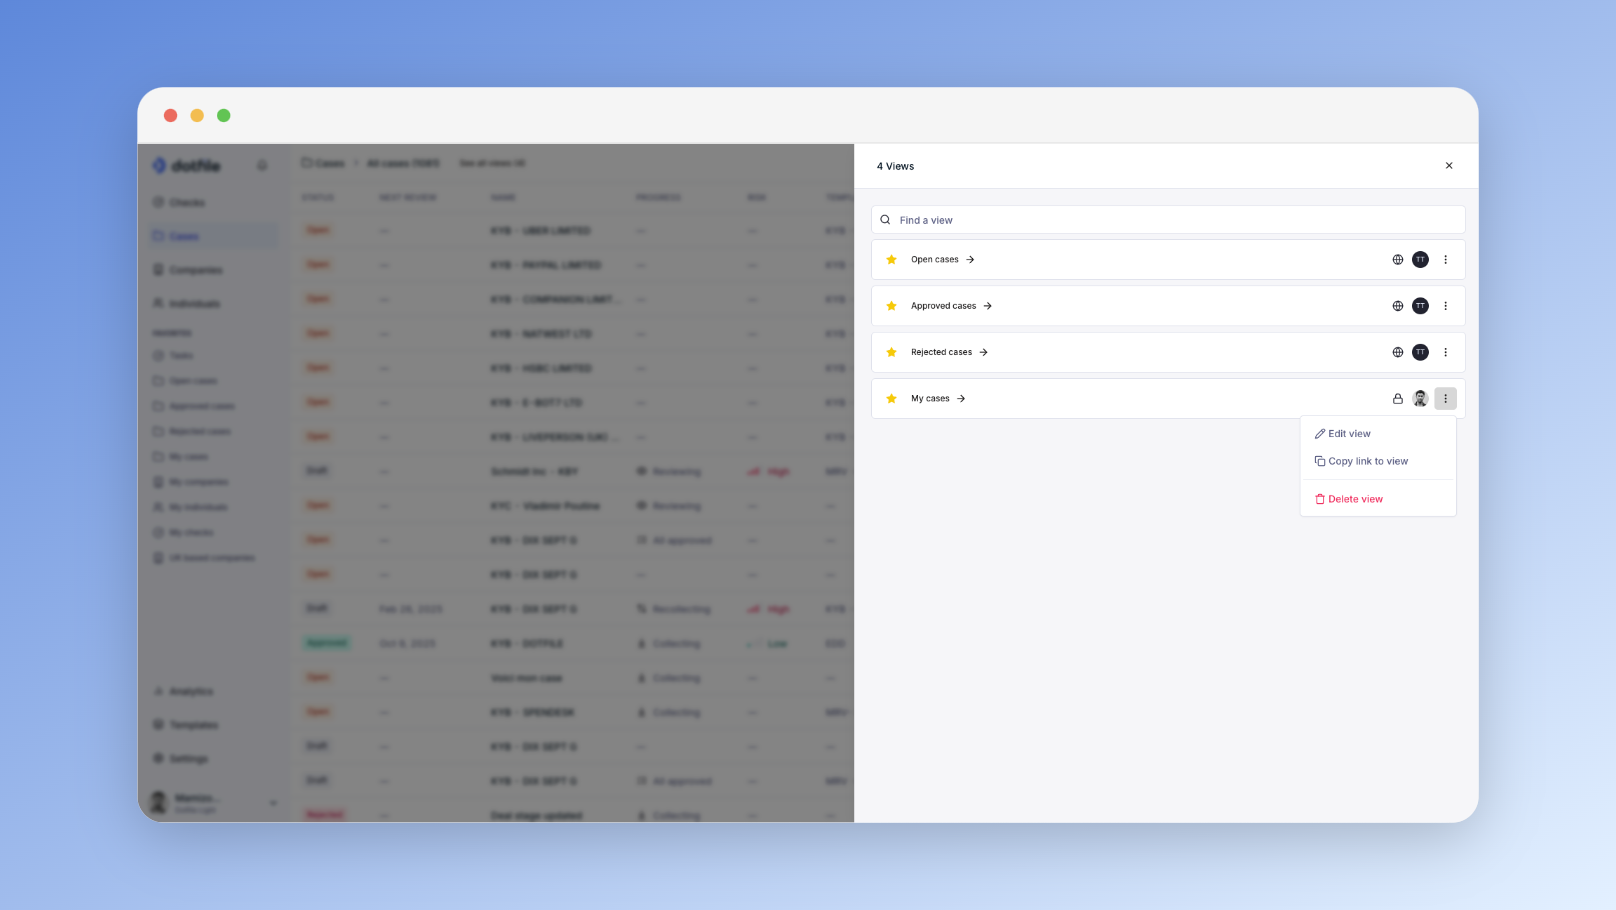
- Choose to share views with all workspace members or keep them private for personal use.
- Mark specific views as favorites for quick access.
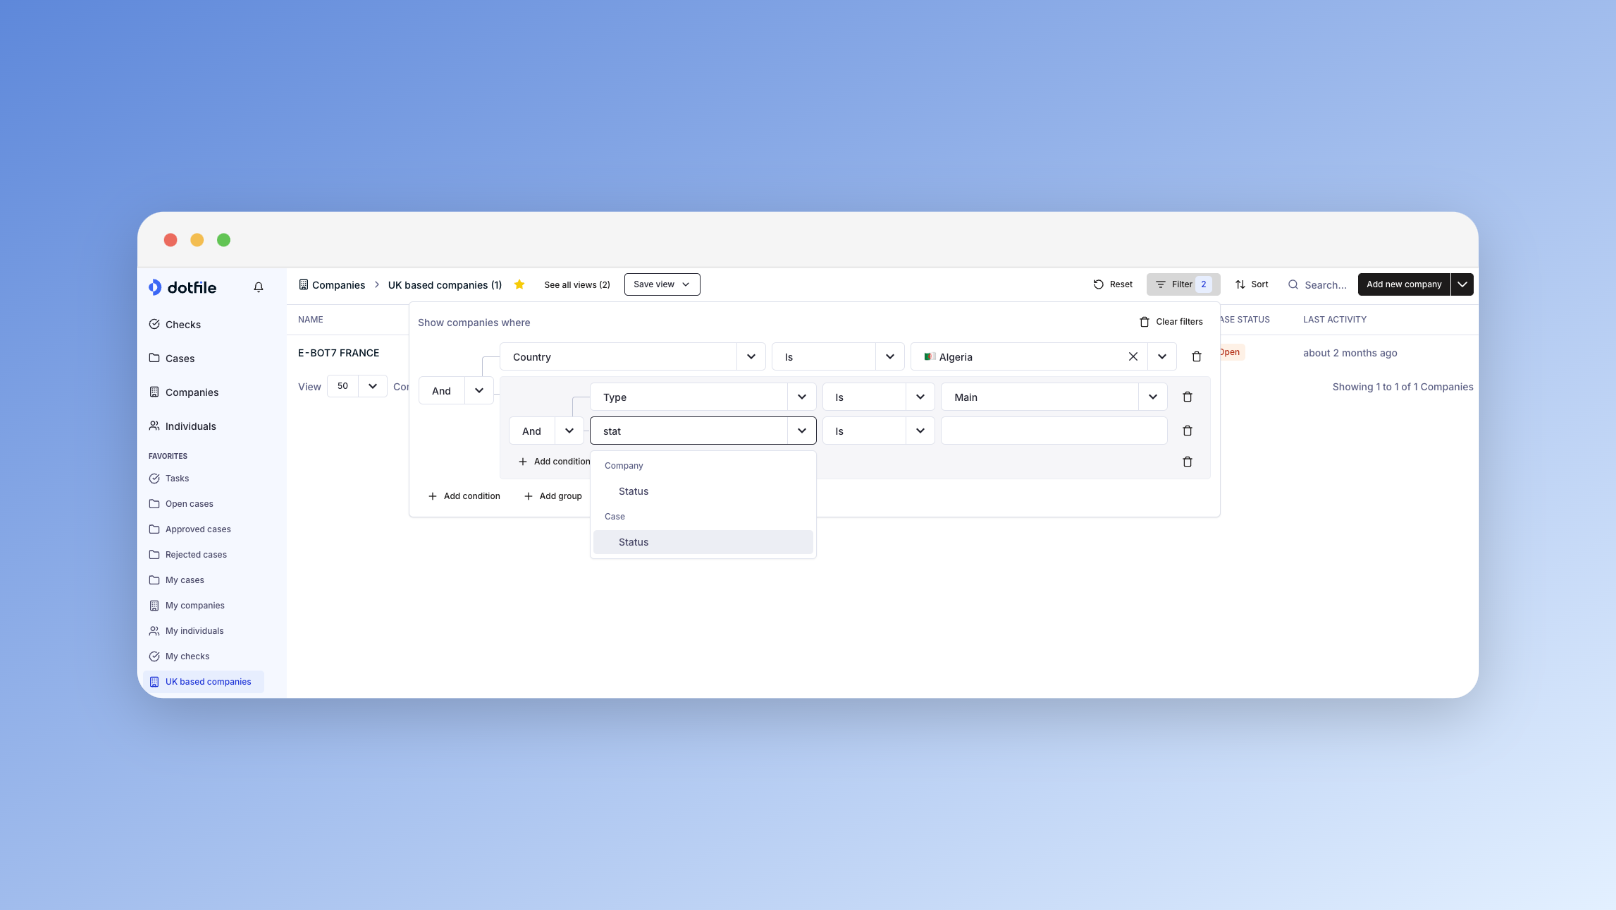
Custom Views are built on top of Standard Views using advanced filters. Here’s how they can be customized:
- Checks Views:Filter by properties of the check, case, company, or individuals.
- Cases Views: Filter by default and custom case properties.
- Company Views: Filter by default and custom company properties.
- Individual Views: Filter by default and custom individual properties.
Benefits of Custom Views
- Tailored Data Access : Custom Views provide a flexible way to narrow down data based on your criteria, ensuring you focus on what's most relevant to your tasks.
- Improved Collaboration: Share your Custom Views with the entire workspace to standardize how data is accessed and reviewed.
- Enhanced Productivity: Mark frequently used views as favorites, so you can easily navigate to them without wading through extensive datasets.
Creating a Custom View
To create a new Custom View, follow these steps:
-
Navigate to a Standard View: Choose from the Checks, Cases, Companies, or Individuals views as your starting point.
-
Apply Filters: Use advanced filtering to define your criteria. Example, filter cases created in the last week or companies located in a specific region.
-
Save the View
-
Define the accessibility : Choose to make the view accessible to all members of your workspace or keep the view for personal use only.
-
Mark as Favorite (Optional): Highlight the view as a favorite for quick access.
-
Open all the views to manage each of them
Examples of Use Cases
- Risk Management: Create a Custom View to display high-risk cases or specific types of checks.
- Team Follow-Ups: Build a view to monitor cases assigned to specific team members.
- Region-Based Monitoring: Filter companies or individuals by geographic location for localized operations.