Document Check
Introduction
The Document Check allows you to collect and verify documents for both Companies and Individuals. The Document Check requires the compliance analyst to look at the document and make a decision on whether it can be approved or not.
It helps streamline the document management process and keep track of important information such as the document expiration date and review history.
What You Can Do with Document Checks
This video shows you how you can:
- Require a document for a specific company
- Send a link to a portal where your end-user can upload the document
- Reject the document with a comment that will be shown to the end-user
- Assign an expiration date to a document
- Create Document Checks in batch thanks to Templates
How to Use Document Checks
Create a document check:
- Access the entity for which you want to perform the check
- Click on “Start new check”
- Click on “Document”
- Select the appropriate document type from the list of available options (e.g. Identity Document, Proof of Address, Articles of Association, etc.).
You can then upload the document yourself or send the link to the onboarding portal to your customers so they can upload it themselves. The check will stay in “In Progress” status until a file is added.
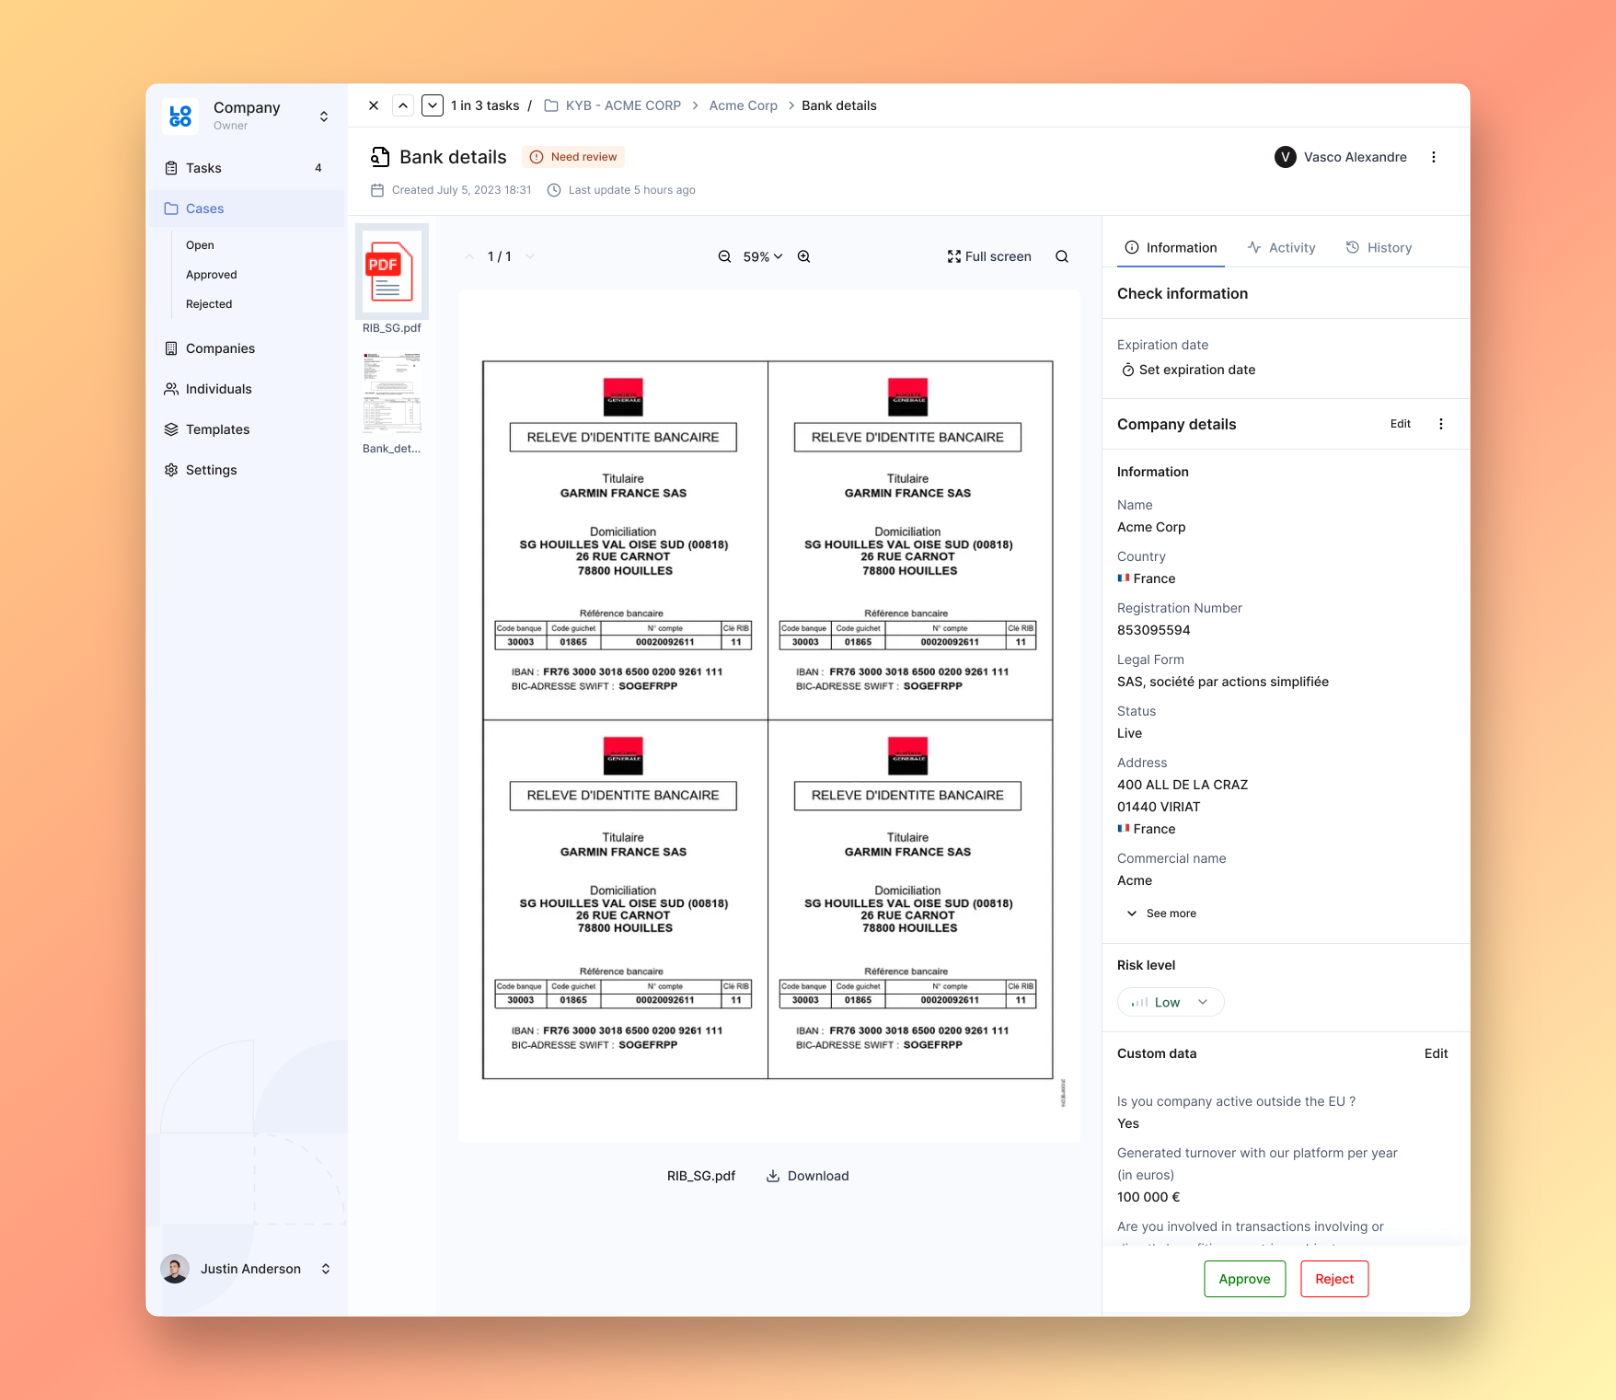
Document Review
Once a file is uploaded, the Document Check will be marked as "Need Review." Your compliance team can now review the document and decide whether to approve or reject it. No external provider analysis is performed on these checks. The decision to approve or reject rests solely with you.
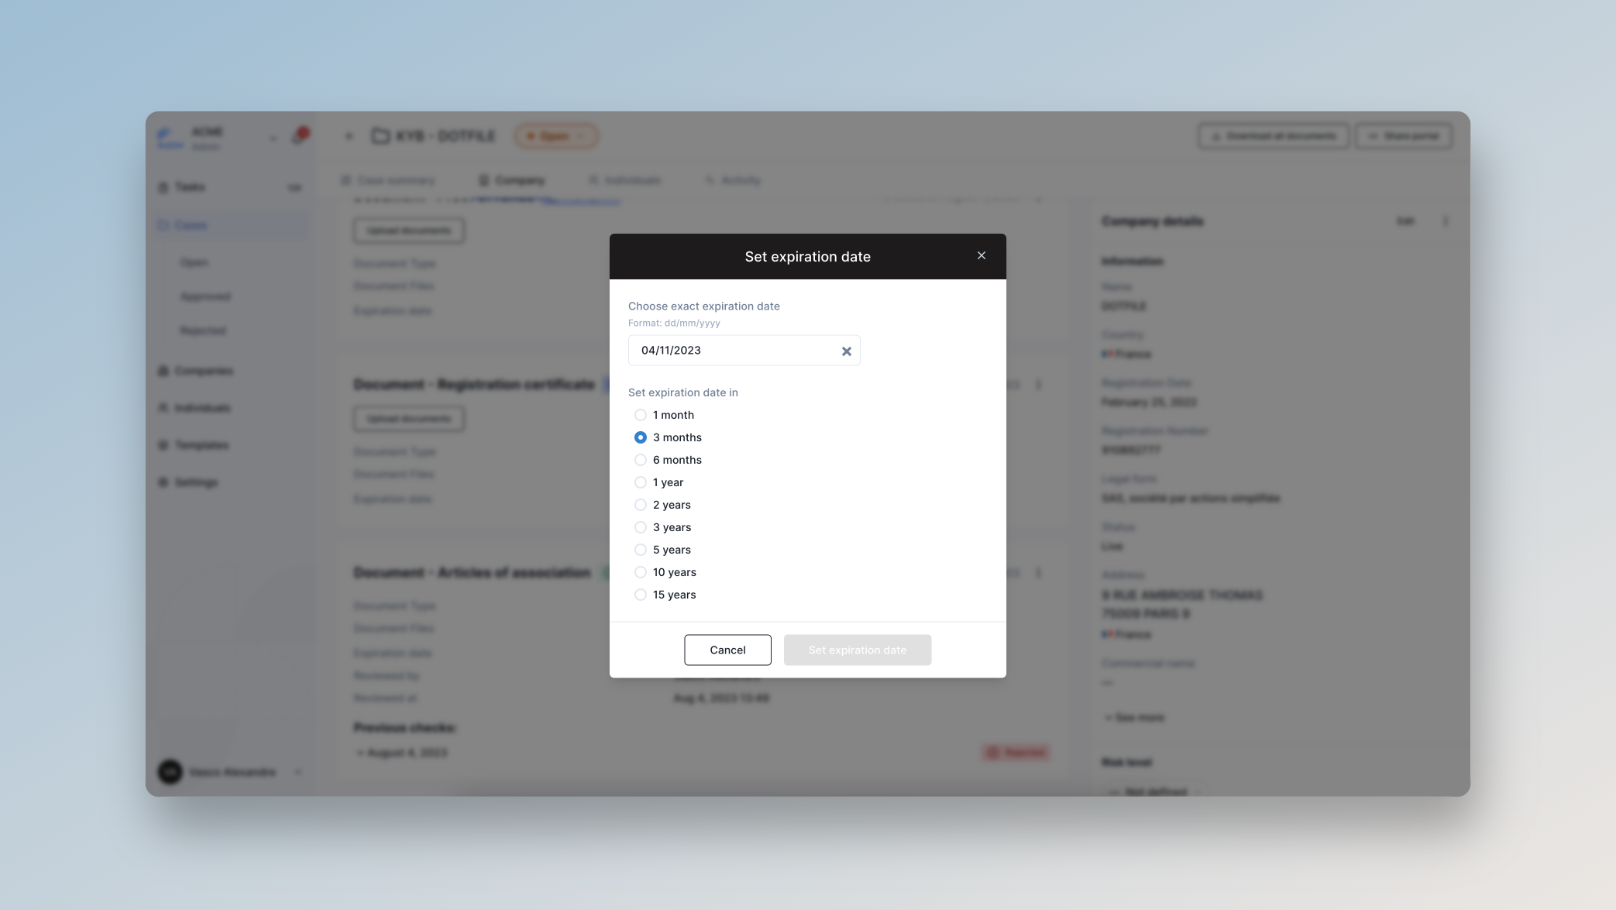
Expiration Tracking
The Document Check also tracks the document's expiration date to ensure compliance over time. Click on “Set an expiration date” and select a date. When the date arrives, we'll remind you to collect the document again. It will appear in your task list with the status “Expired”.