Build your first recipe
Recipes are automated workflows that connect your apps. Each recipe contains a trigger and one or more actions. When you start a recipe, it waits for a triggering event to run the actions.
The following steps guide you through building a recipe that triggers a case that needs review to send a Slack message.
Step 1: Open Integration Studio and create a new recipe
Complete the following steps to create a new recipe:
- Go to your Dotfile console → Settings → Integrations → Integration Studio.
- Go to the Projects page.
- Select an existing project or click Create project to create a new one. By default you will find a project named “Integrations” with a prebuild connection to Dotfile connector.
- Click Create, and then select Recipe.
- Enter My first recipe in the Name field.
- Use the Location drop-down menu to select the folder where the recipe should be created.
- Use Trigger from an app as the recipe starting point, then click Start building.

Step 2: Set up the trigger
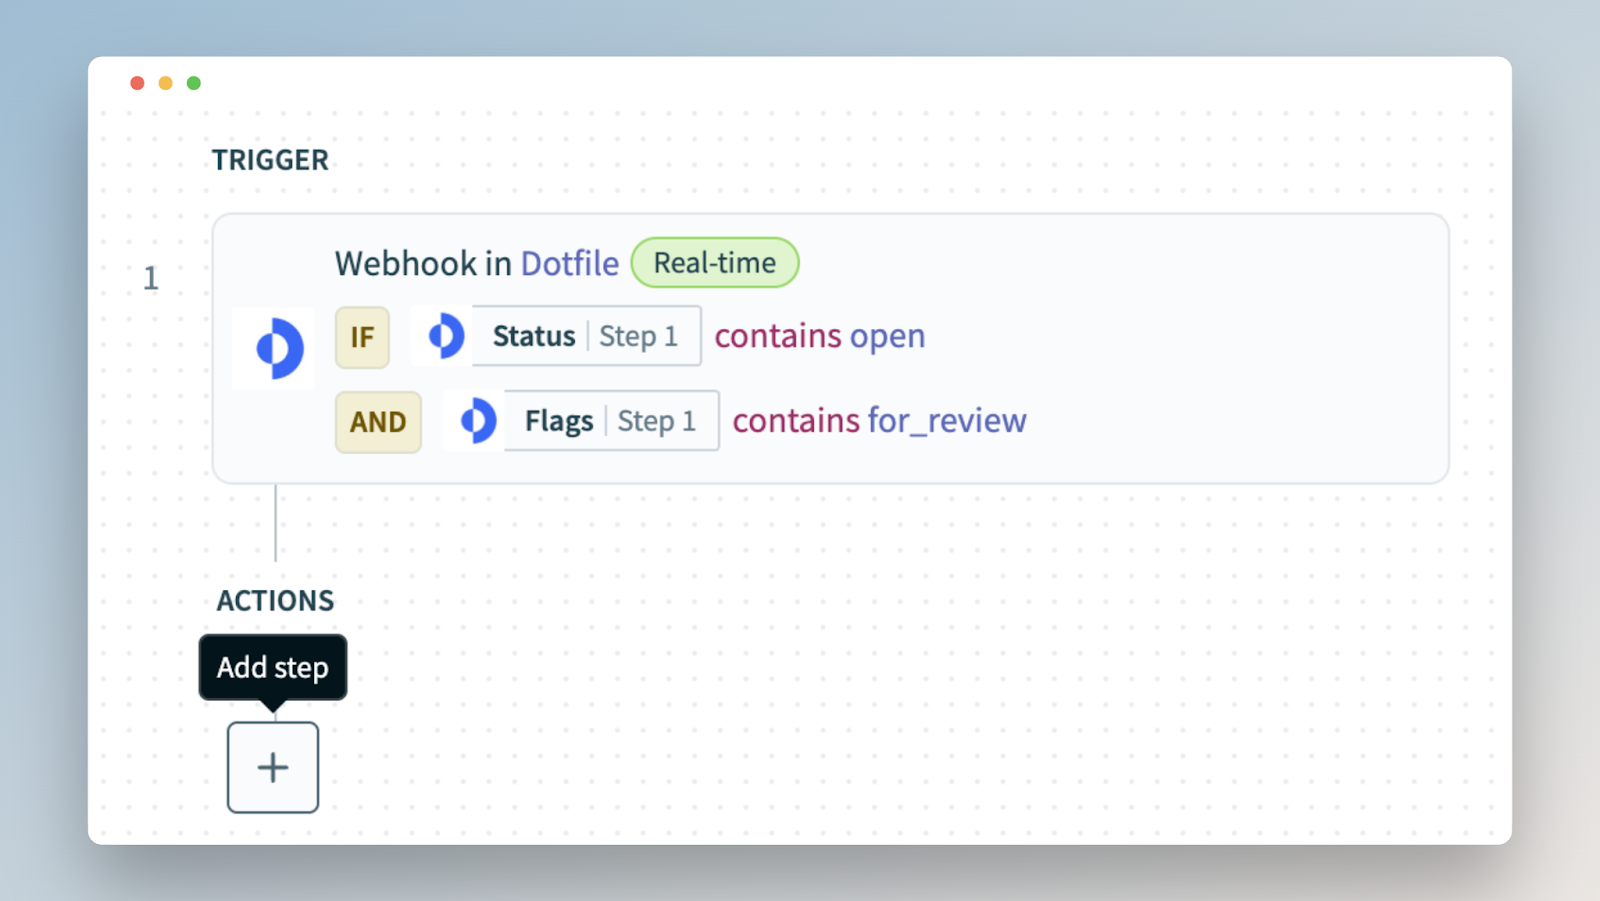
The following trigger activates whenever a Dotfile case is open and needs review. When you start the recipe, it checks for matching events in real-time.
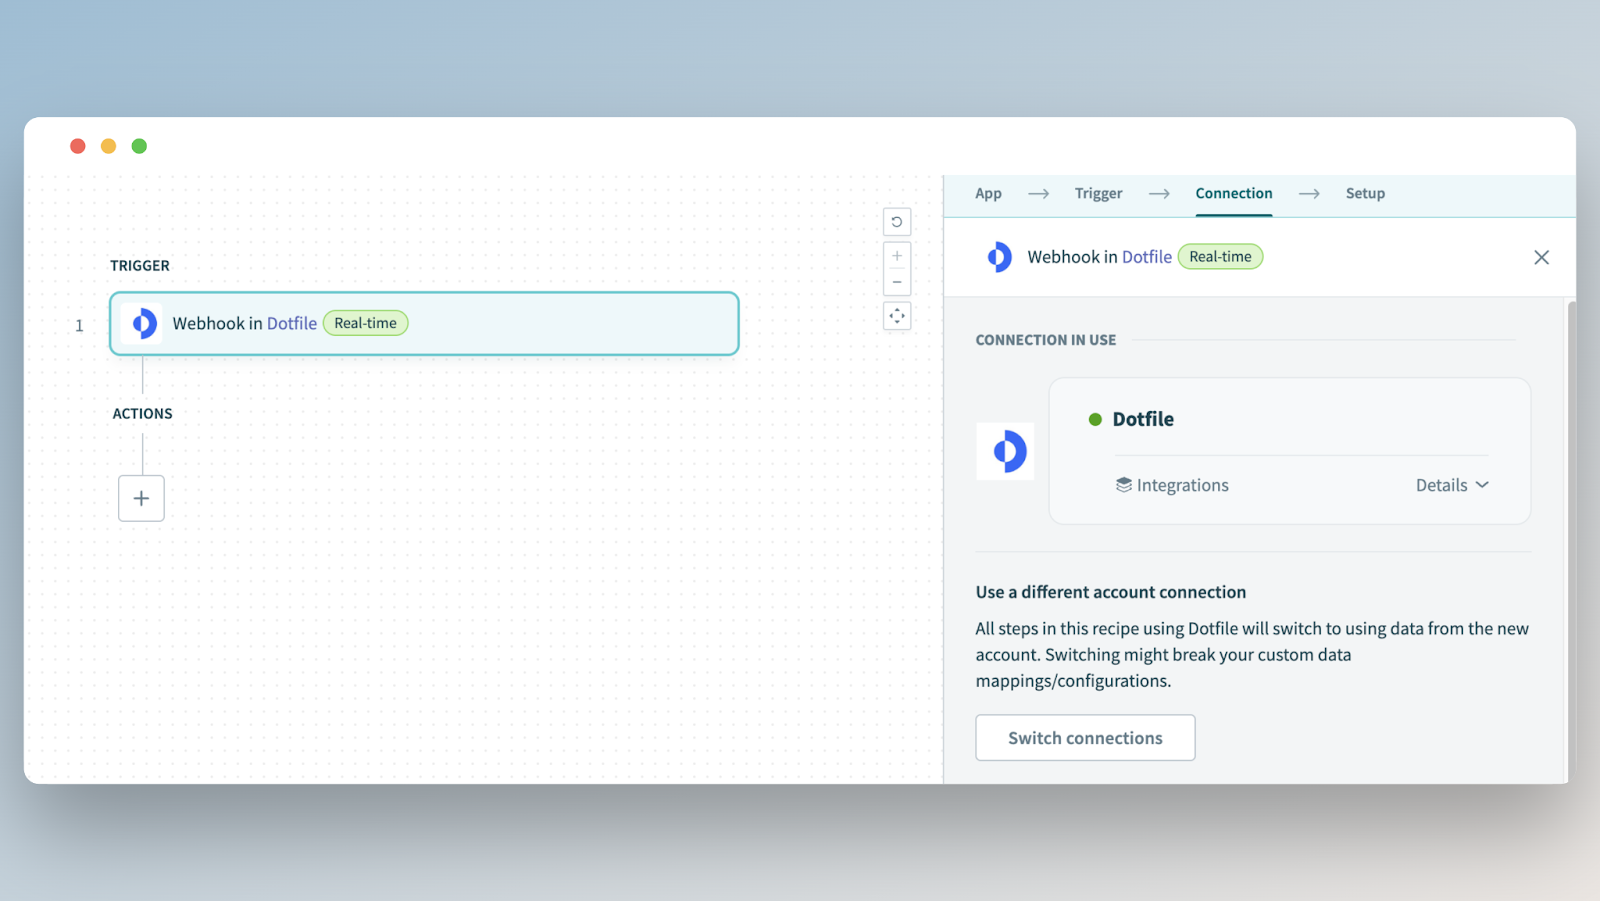
- Choose the Dotfile app within the connected apps and select an active connection.
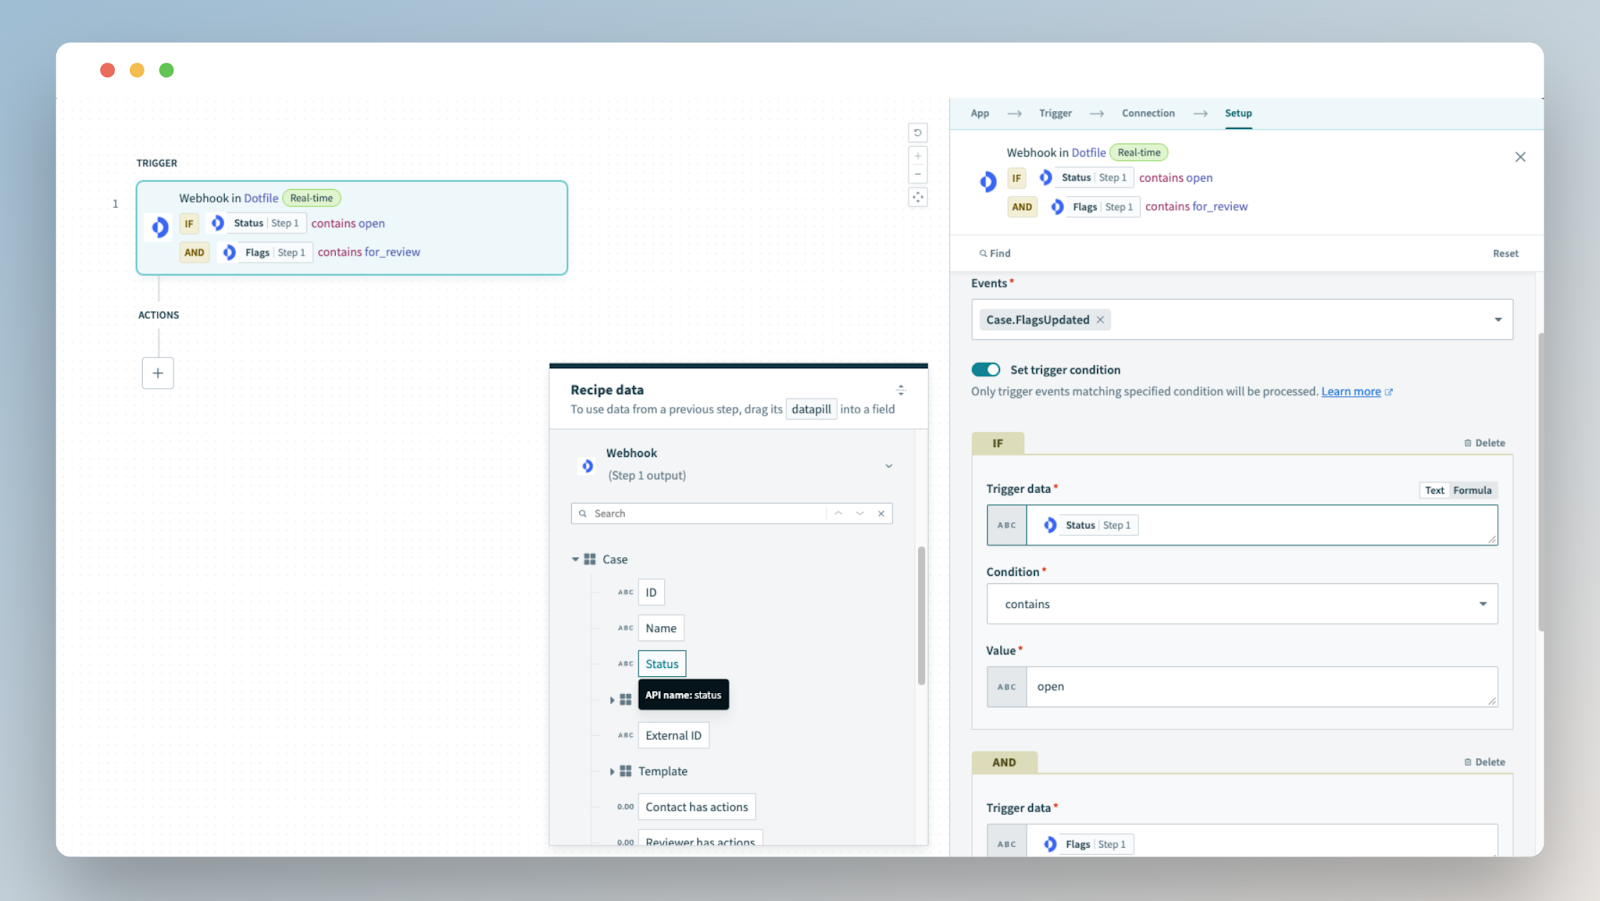
- Setup the trigger Events into the Setup stage.
- Choose Case.FlagsUpdated event in Events drop-down menu.
- Click the Set trigger condition toggle to trigger only opened cases
- Locate the Dotfile case status datapill in the Recipe data menu under Webhook (Step 1 output) > Fields > Case > Status and map it to the Trigger data field.
- Select contains in the Condition field.
- Enter open in the Value field.
- Add a condition on for_review flag
- Click on + under the first IF condition
- Select AND operator
- Locate the Dotfile case flags datapill in the Recipe data menu under Webhook (Step 1 output) > Fields > Case > Flags and map it to the Trigger data field.
- Select contains in the Condition field.
- Enter for_review in the Value field.
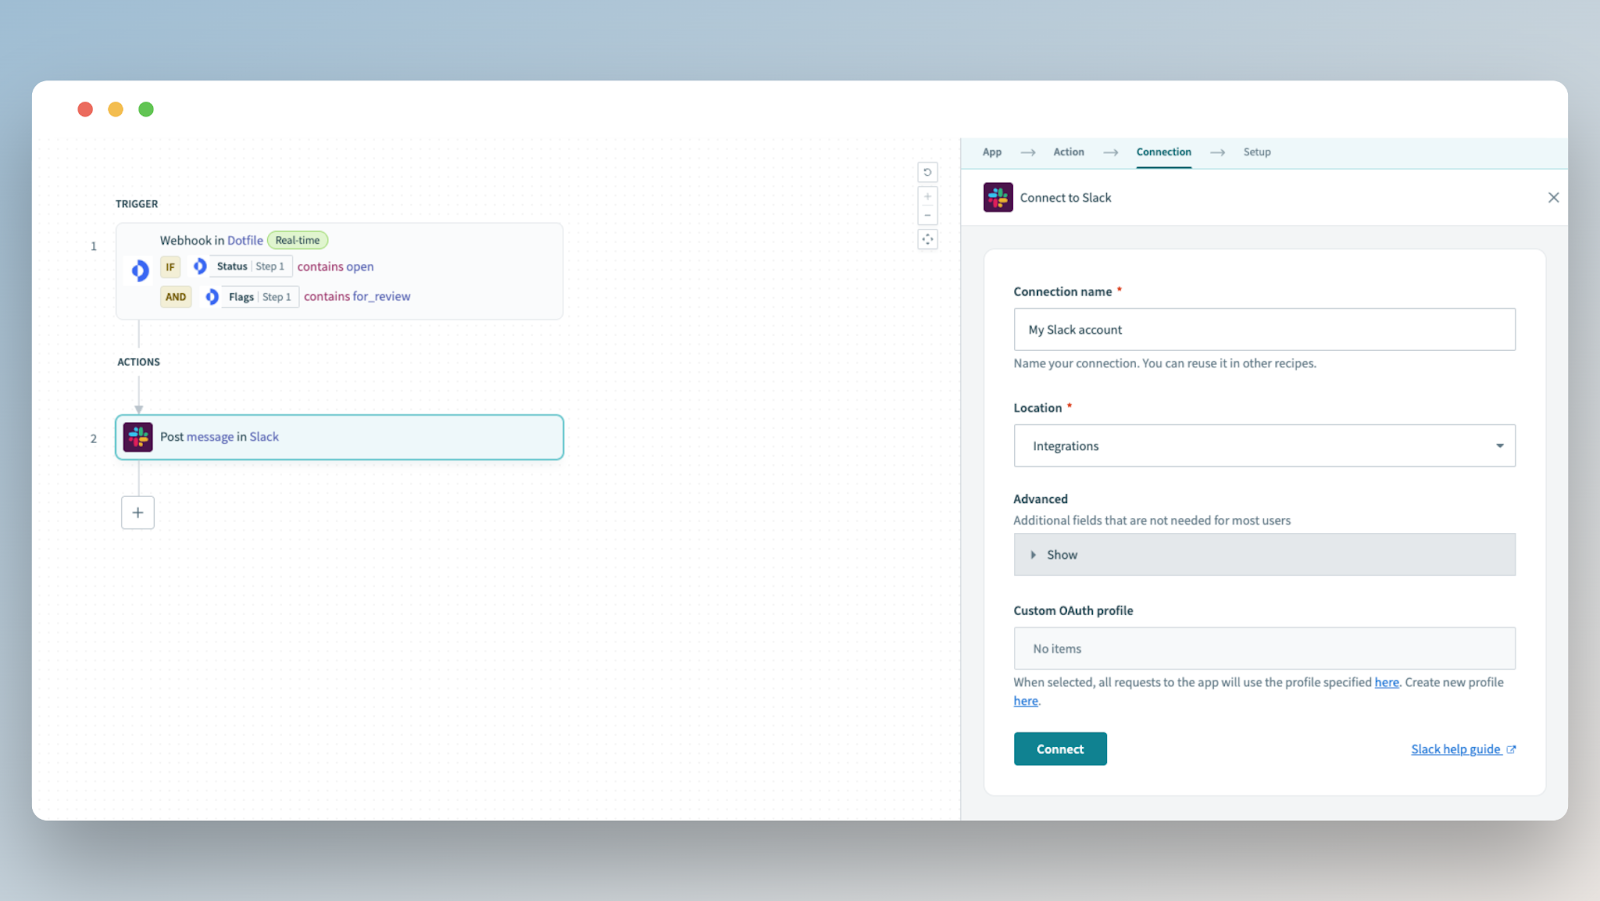
Step 3: Connect to Slack
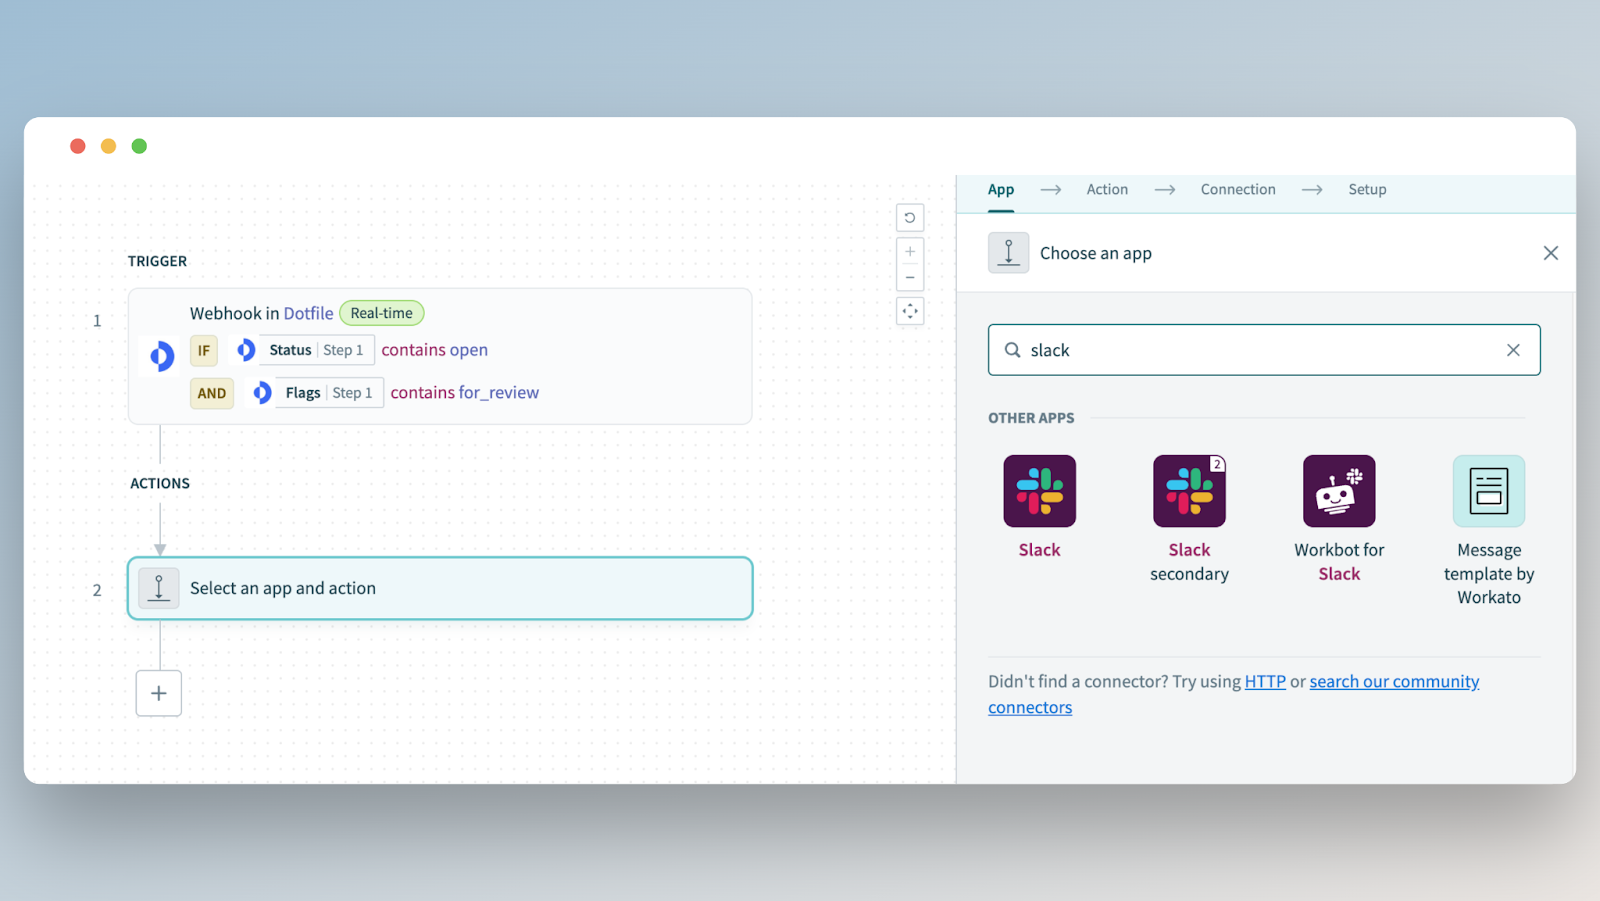
- Click + Add step, and then select Action in app.
- Search for and select Slack in the Choose an app search box.
- Search for and select Post message slack action.
- Set up your connection to Slack.
- Define a Connection name.
- Use the Location drop-down menu to select the folder where the connection should be created.
- Click on Connect button and accept connection to you Slack account.
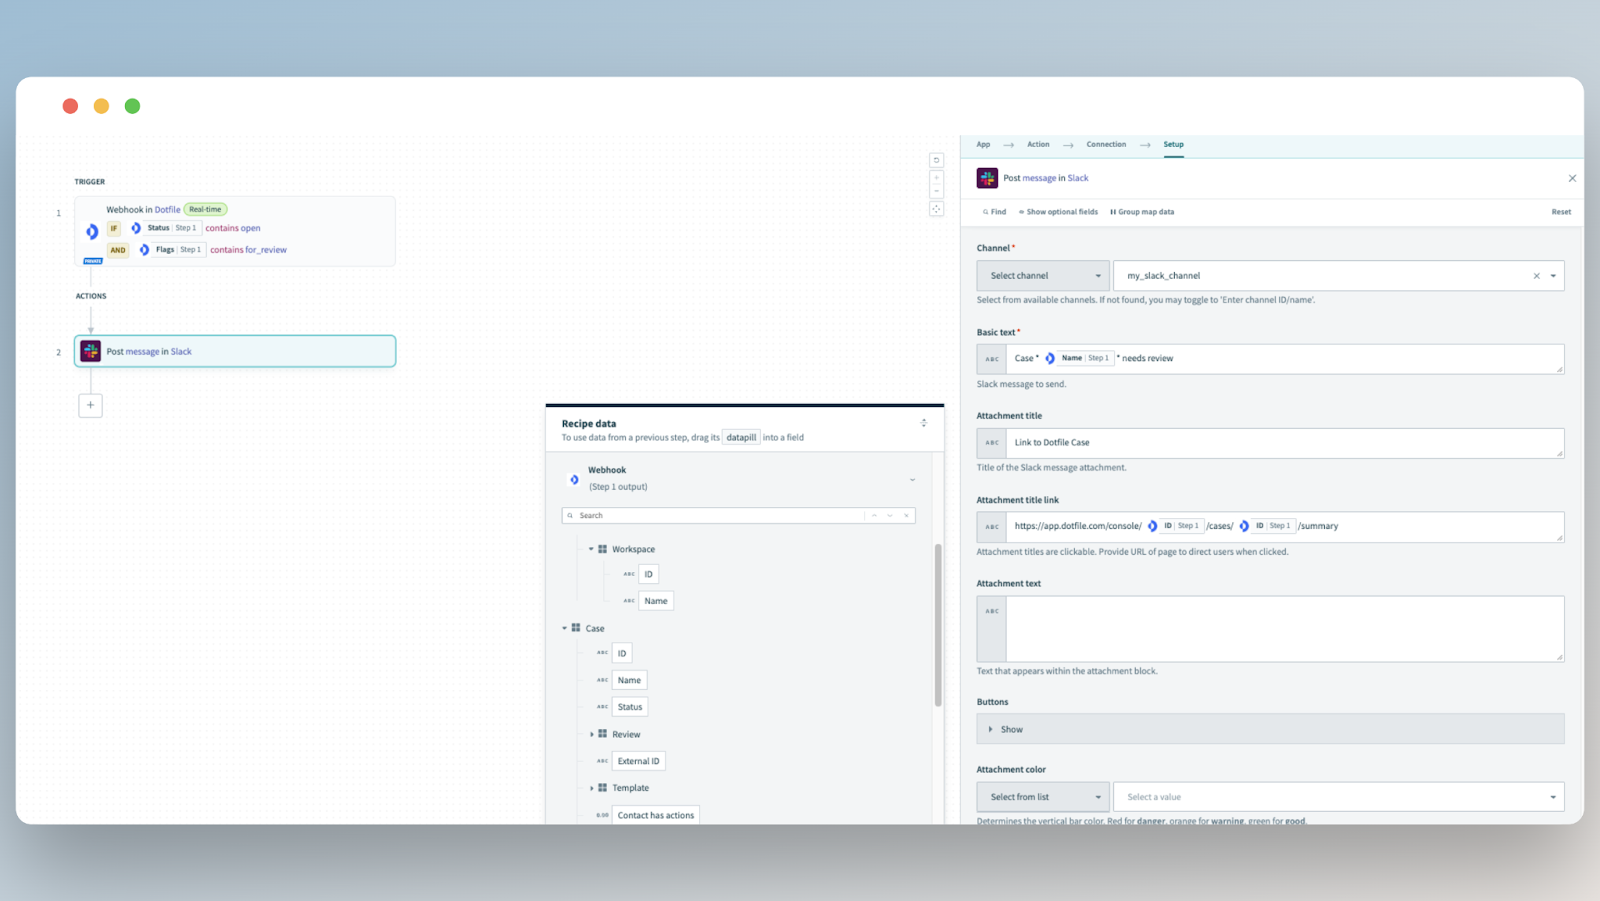
- Set up Slack message content.
- Select Slack Channel on which the message will be sent.
- Use Webhook (Step 1 output) > Fields > Case > Name to give Dotfile context with case name and Webhook (Step 1 output) > Fields > Context > Workspace > ID and Webhook (Step 1 output) > Fields > Case > ID build the case link to Dotfile console.
Step 4: Save and start your recipe
- Click Save, then Exit.
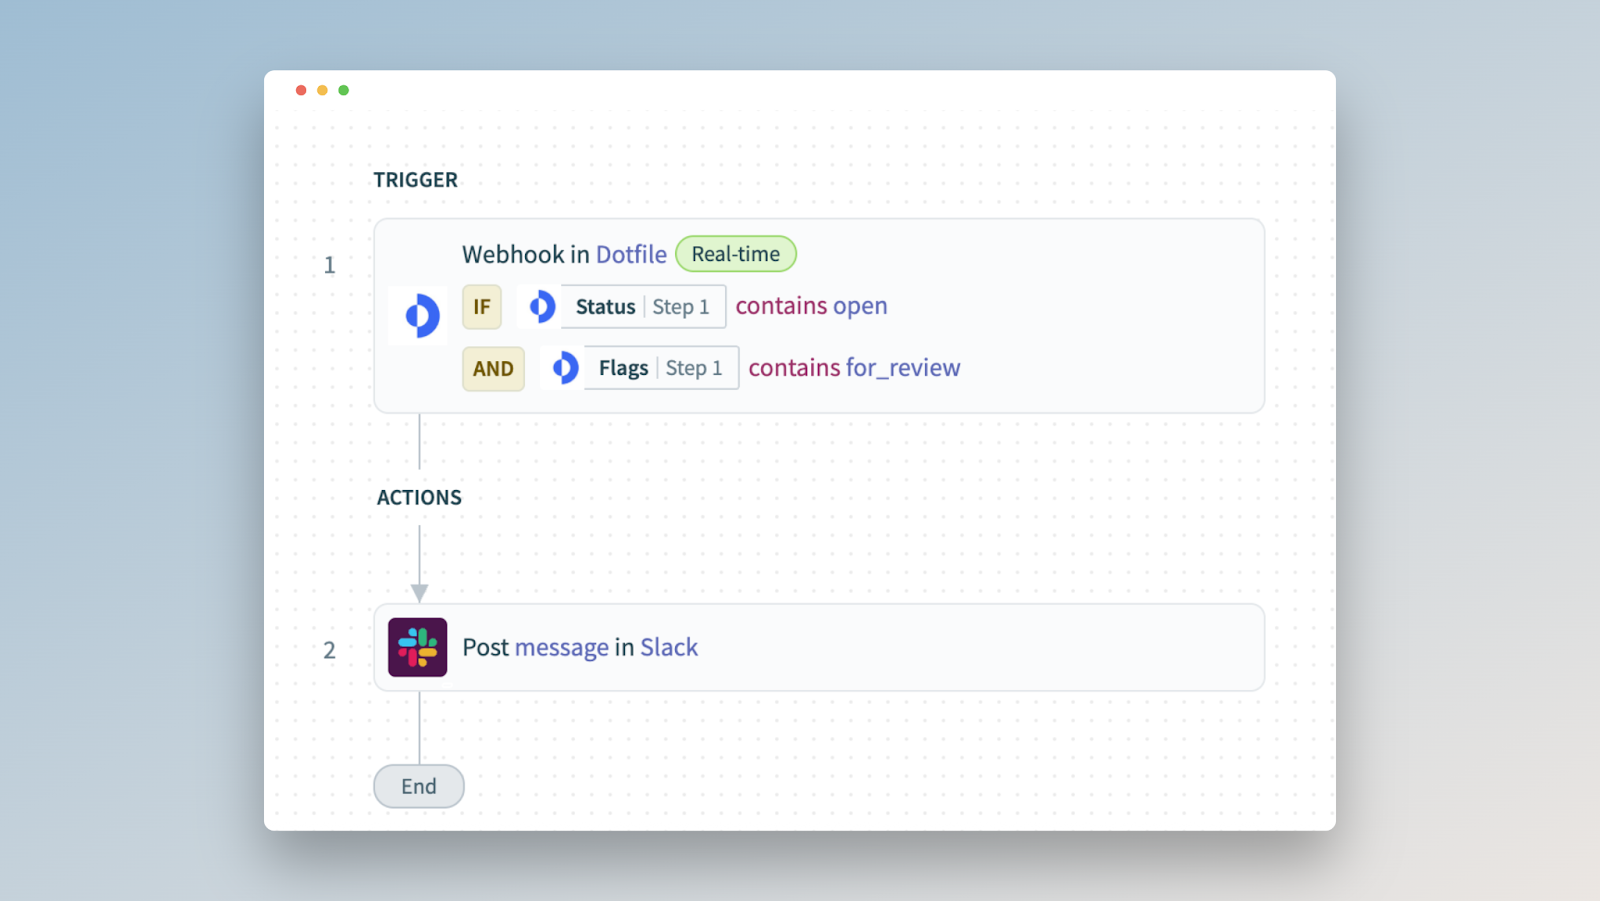
- Click Start recipe. Your completed recipe should resemble the following screenshot:
📖 Learn more: Recipes documentation.