SSO
Introduction
This article will walk you through how to set up and use Single Sign-On (SSO) with OpenID Connect (OIDC) in Dotfile. Enterprise SSO allows your team to authenticate using your company's existing Identity Provider — such as Google Workspace, Microsoft Entra ID, or Okta — centralizing security & access instead of managing separate Dotfile passwords.
How It Works
When SSO is configured, Dotfile detects the user's email domain at login and offers a one-click redirect to their Identity Provider. After the user authenticates with their corporate credentials, they are automatically logged into Dotfile.
Configuration
-
Domain verification: Before enabling SSO, workspace admins must verify ownership of their email domain via a DNS TXT record. This prevents unauthorized domain claims.
-
SSO enforcement: Workspace admins can require SSO as the only authentication method, blocking password and social login for all workspace users.
Login Flow
-
Automatic domain detection: When a user enters their email on the Dotfile login page, if their email domain has SSO configured on a workspace, the page displays a "Continue with [Provider]" button.
-
Identity Provider redirect: Clicking the SSO button redirects the user to their Identity Provider like Google Workspace, Microsoft Entra ID, Okta, or any OIDC-compliant provider. After authenticating the user is redirected back to Dotfile. ⚠️ The user email on the provider must be the same as for the Dotfile user.
-
Just-In-Time provisioning: New users authenticating via SSO for the first time are automatically created in Dotfile, using email, first name, last name from the identity provider. They will still need to be invited to your workspace.
Existing users are linked to their OIDC identity on their first SSO login. If their email address is not verified, they will be asked for verification first.
Setting Up SSO
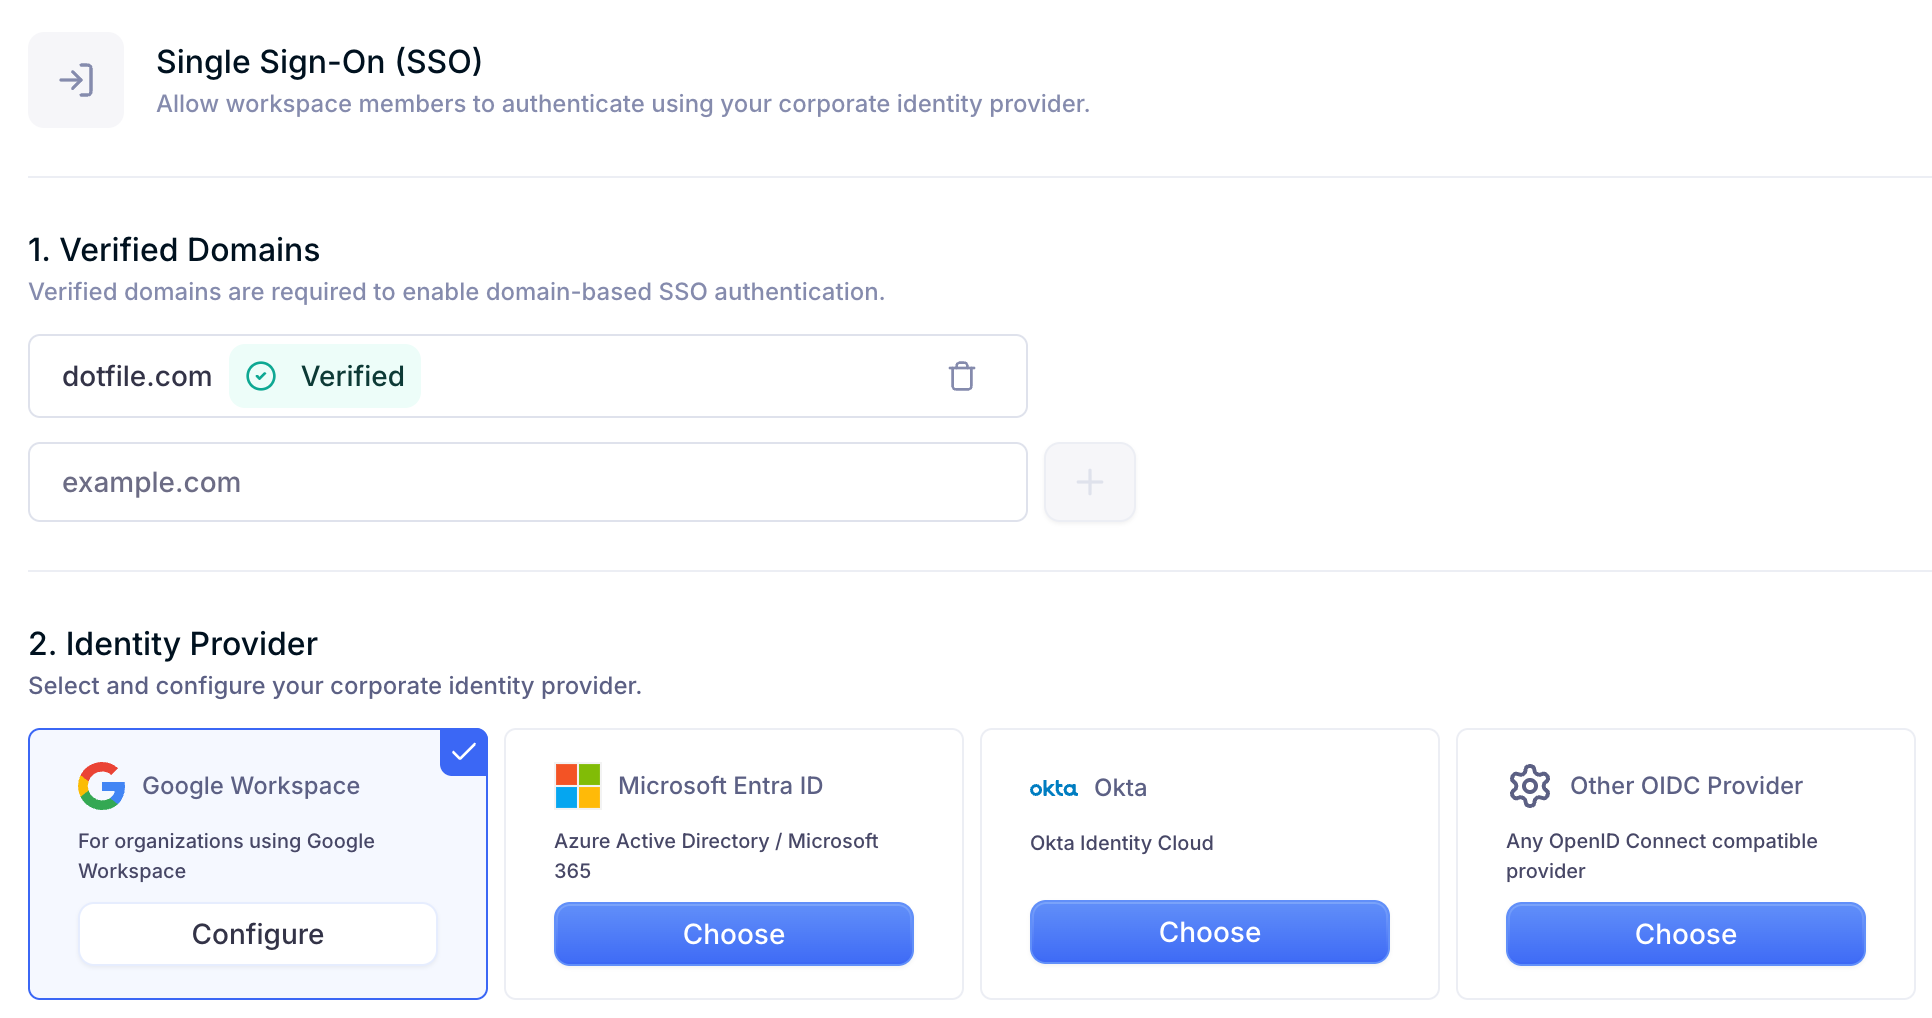
Configuring SSO is done from the workspace Settings page under the SSO section. The setup involves 2 steps: verifying your domain then configuring your Identity Provider.
Step 1: Verify Your Domain
Before connecting an Identity Provider, you must verify that your organization owns the email domain (e.g., "acme.com").
-
In Settings > Users > Security > SSO, click Add Domain and enter your email domain.
-
Dotfile generates a unique verification token.
-
Create a DNS TXT record at
_dotfile-verification.{your-domain}with the valuedotfile-verification={token}. -
Click Verify. Dotfile checks the DNS record and marks the domain as verified.
You can verify up to 10 domains per workspace.
Step 2: Configure Your Identity Provider
Once your domain is verified, you can connect your corporate Identity Provider.
-
In Settings > Users > Security > SSO, click Configure Identity Provider.
-
Select your provider type:
| Provider | What You Need |
|---|---|
| Google Workspace | Client ID and Client Secret from Google Cloud Console. Note: Issuer URL is pre-configured. |
| Microsoft Entra ID | Tenant ID, Client ID, and Client Secret from Azure Portal Note: When configuring redirect URLs, platform type must be "web" |
| Okta | Okta subdomain, Client ID, and Client Secret from Okta Admin Console Notes:
|
| Other OIDC Provider | Issuer URL, Client ID, and Client Secret |
-
Enter a display name for the provider (e.g., "Acme Okta SSO").
-
Enter the required credentials from your Identity Provider.
-
Assign one or more verified domains to this provider.
-
In your Identity Provider's admin console, add
https://console-api.dotfile.com/auth/oidc/callbackas an authorized redirect URI.
Each workspace supports at most one Identity Provider configuration.
SSO vs. Google Social Login
Dotfile offers two ways to sign in with a Google account. It is important to understand the difference:
| Enterprise SSO (OIDC) | Google Social Login | |
|---|---|---|
| Purpose | Corporate security and centralized authentication | Convenience for individual users |
| Managed by | Workspace admin and IT team | Individual user |
| Supports enforcement | Yes | No |
| Best for | Organizations requiring centralized access control | Individual users who prefer Google login |